DIY Sangria: Your Easy Guide to Crafting the Perfect Pitcher
There are few things as refreshing, elegant, and effortlessly festive as a pitcher of sangria. This vibrant wine punch, originating from the sun-drenched regions of Spain and Portugal, has become a global favorite for good reason. It’s a true celebration in a glass, and the best part? Crafting your own diy sangria is surprisingly simple, requiring minimal prep work for maximum impact. Forget complicated cocktail recipes; sangria embraces creativity and personal preference, making it the ultimate homemade concoction for any gathering, big or small. From a casual summer afternoon on the patio to a sophisticated dinner party, a homemade sangria sets the perfect tone. It's a drink that encourages shared moments, laughter, and a touch of Mediterranean charm, all easily achievable from your own kitchen.What Makes Sangria So Special? The Spanish & Portuguese Tradition
At its heart, sangria is an alcoholic punch that blends wine with chopped fruit, often enhanced with a touch of liquor, fruit juice, and sometimes sparkling water. While the concept sounds straightforward, its allure lies in its ancient roots and incredible versatility. The name "sangria" itself comes from the Spanish word "sangre," meaning blood, a nod to its traditional deep red color from red wine. What truly sets sangria apart is its flexible nature. Unlike many rigid cocktail recipes, there's no single "right" way to make it. It’s more of a delicious formula, an open invitation to experiment with flavors, textures, and aromas. This makes diy sangria not just a drink, but an experience in culinary exploration. You can stick to the timeless red wine version, or venture into a world of variations that suit every season and palate.Building Your Perfect DIY Sangria: The Essential Ingredients
The beauty of diy sangria lies in combining a few key components to create a harmonious symphony of flavors. Understanding each ingredient's role will empower you to customize your pitcher to perfection.Choosing Your Wine: The Soul of Your Sangria
The wine forms the foundation of your sangria, so it’s crucial to select one you genuinely enjoy. However, there’s no need to break the bank. In fact, sangria is a brilliant way to elevate a more affordable bottle of wine, transforming it into something spectacular. For a classic Spanish red wine sangria, opt for varieties that are fruity, approachable, and not overly tannic or acidic. Excellent red wine choices include:- Garnacha (Grenache): Known for its red fruit flavors and moderate tannins.
- Rioja (Crianza or Joven): Often showcases berry and plum notes with a smooth finish.
- Pinot Noir: Light-bodied with bright red fruit and earthy undertones.
- Malbec: Offers dark fruit flavors and a velvety texture.
- Merlot: Soft and fruity, with notes of cherry and plum.
Fruiting It Up: Flavor and Visual Appeal
Fruit is not merely an garnish in sangria; it’s a vital contributor to both flavor and aesthetics. As the fruit macerates in the wine, it releases its juices, enriching the drink with natural sweetness and aromatic depth. For your diy sangria, choose sturdy fruits that won't disintegrate quickly but will hold their shape, making for a stunning presentation. Popular and resilient fruit options include:- Oranges: A classic choice, adding citrusy brightness.
- Apples: Offer a crisp texture and mild sweetness.
- Strawberries: Burst with juicy, sweet-tart flavor.
- Peaches/Nectarines: Lend a lovely summery sweetness and soft texture.
- Pineapple: Adds a tropical tang.
- Pears: Provide a subtle, elegant sweetness.
- Lemons/Limes: Essential for balancing sweetness and adding zest.
The Liquor Layer: Adding Depth (Optional)
While not strictly mandatory, a splash of liquor can elevate your diy sangria from a wine punch to a true cocktail. Brandy is the most traditional choice, lending a warming, nuanced fruitiness. However, feel free to experiment:- Fruit Schnapps: To amplify specific fruit flavors (e.g., peach schnapps with peaches).
- Rum (light or dark): Adds a touch of tropical sweetness or a deeper, molasses note.
- Cognac: A sophisticated alternative to brandy, offering more complexity.
Sweetness & Sparkle: Balancing the Flavors
To round out your sangria, a sweetener can balance the tartness of the fruit and wine. This is entirely a matter of personal preference and depends on the sweetness of your chosen wine and fruit. Natural sweeteners integrate best:- Maple Syrup or Agave Nectar: Easy to mix and offer distinct flavor profiles.
- Granulated Sugar: Dissolves best if mixed with a little liquid first.
- Simple Syrup: A classic bartender's choice, made by dissolving sugar in hot water.
Crafting Your Classic Red DIY Sangria: A Step-by-Step Guide
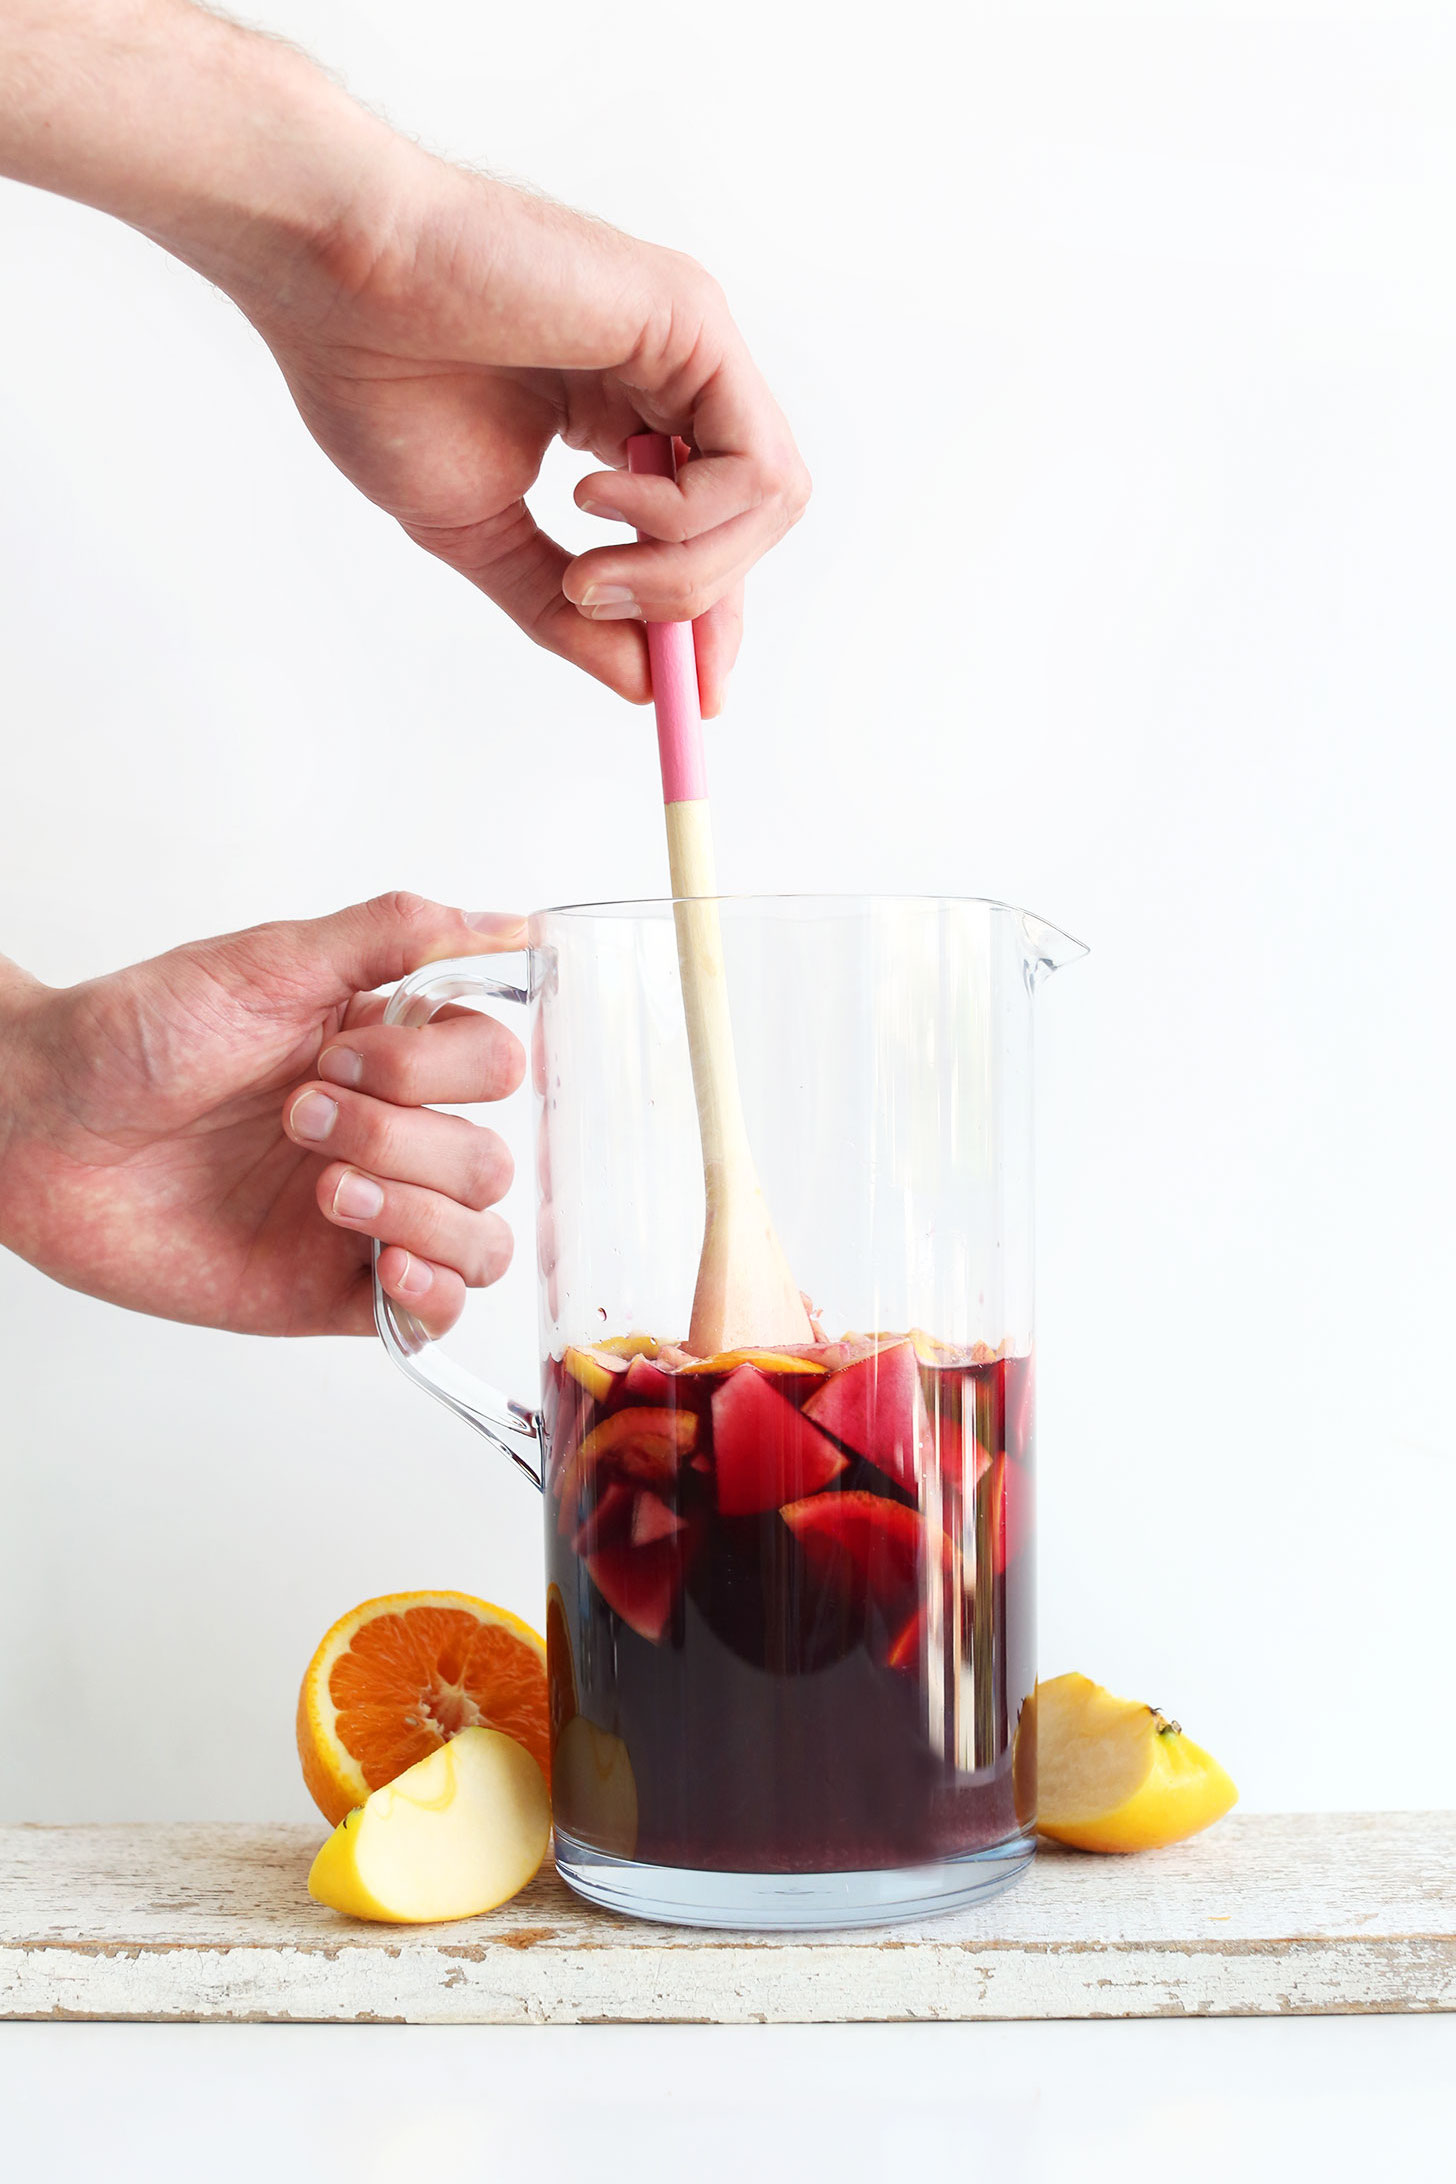
Now that you have your ingredients, let's bring them together for a quintessential red wine diy sangria. This recipe focuses on creating a rich, flavorful base, with optional additions for fizz.Step 1: Macerate the Fruit (The Flavor Secret)
Begin by combining your chosen chopped fruits with your sweetener in a large pitcher. Gently stir them together. Allow the fruit to macerate (sit at room temperature) for at least 20-30 minutes, or even an hour. This crucial step draws out the natural juices and sugars from the fruit, allowing their flavors to meld and deepen before the wine is added. This infusion is what gives homemade sangria its signature rich fruit essence.
Step 2: Combine the Liquids
Pour in your bottle of red wine and any chosen liquor (like brandy). Give it a good stir, ensuring the sweetener is fully dissolved. If you're adding fruit juice (e.g., a splash of orange juice), now is the time to include it.
- Pro Tip: For a standard 750ml bottle of wine, aim for about 1/4 to 1/2 cup of liquor and 2-3 cups of chopped fruit. Adjust sweetener to taste.
Step 3: Chill for Perfection
Cover your pitcher and refrigerate your sangria for at least 2 to 4 hours. Ideally, aim for 4 to 8 hours, or even overnight. This chilling period is vital for the flavors to fully meld and develop. The longer it chills, the more integrated and delicious your sangria will become. A truly good diy sangria is not rushed.
Step 4: Serve and Enjoy!
Just before serving, taste your sangria and adjust sweetness if needed. If you desire some effervescence, top off each glass or the entire pitcher with a splash of sparkling water or club soda. Serve over ice, ensuring each glass gets a generous scoop of the wine-soaked fruit. Garnish with a fresh orange slice or a sprig of mint for an extra touch of elegance.
Beyond the Basics: Endless DIY Sangria Variations
The beauty of diy sangria truly shines in its adaptability. While the classic red is undeniably delicious, don't be afraid to think outside the traditional pitcher. Sangria is, after all, a loose formula begging for your personal touch. Consider these exciting variations:- White Sangria: Swap red wine for a crisp white, like Pinot Grigio or Sauvignon Blanc, and pair with lighter fruits like green apples, grapes, and peaches.
- Rosé Sangria: For a pale pink hue and delicate flavor, use rosé wine. Berries, watermelon, and mint work wonderfully here.
- Seasonal Sangrias: Embrace the flavors of the moment! Think apple cider and cinnamon sticks for fall, or cranberries and rosemary for winter.
- Frozen Sangria: Blend your finished sangria with ice for a frosty, slushy treat – perfect for scorching summer days.
- Sparkling Sangria: Use Prosecco or Cava as your base for an extra celebratory bubbly twist.
